


Dip 101: Easy 1-Color Dip Manicure
Get started with Dip Powder at-home, with a simple, single-color manicure that outshines and outlasts polish.
Download the Printable Guide
What you'll need:
Before You Begin: Nail Prep
The essential beginning to the perfect manicure - proper nail prep. Starting with natural nails, free from any previous polishes, begin by thoroughly washing hands and nails.
- Trim away any excess hangnails and carefully push back cuticles to expose your full natural nail beds.
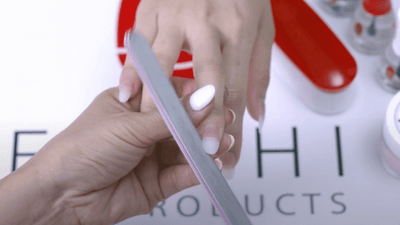
- Using the file and buffer, delicately smoothen your natural nails for a ridge-free surface. Brush away any excess.
Pro Tip: Each step is intended to completed on one nail at a time. Begin on the first nail, completing each step fully, then repeating on remaining nails, before continuing as liquids dry within seconds.
Step 1: Base + Dip
You will need our Step 1: Pro Base, Clear Base Powder, and your choice of Dip Powder color for this step.
Creating a Long-lasting, chip-free, and crack-resistant manicure starts with a clear and solid foundation. While our Dip Powder is odorless, we suggest working in an open and well-ventilated space, as you would with any other treatment.
- Begin with Step 1: Pro Base, applying a quick brush stroke down the center of your nail. Dip into Clear Base Powder, gently brushing away the excess.
- Next, apply Step 1: Probase again, covering your entire nail. Dip into your choice of color, gently tapping away any excess.
- Repeat a second time, applying Probase to the entire nail and dipping into your choice of color. After two layers of dip, apply a final coat of Step 1: Pro Base, covering your entire nail with quick brush strokes.
Step 2: Activate
You will need our Step 2: Activator, and a File or Buffer for this step.
After you have one layer of Base, two layers of Dip, and a final coat of Step 1: Probase, allow the nails to dry for a few seconds.
- Using Step 2: Activator, apply a coat to your nail, ensuring the entire nail is covered. Wait about 30 seconds for the Activator to dry and seal.
- Once dry, use the File and Buffer to gently smooth the nail, removing any excess build-up around the cuticles. Brush clean.
- Then, apply a final coat of Step 2: Activator across the entire nail, wiping away any excess off hands and skin with a paper towel.
Step 3: Finish
You will need our Step 3: Finishing Gel for this step.
The final layer of your manicure creates a gentle shine and provides a protective seal to your treatment.
- Apply Step 3: Finishing Gel, in three quick brush strokes, half-way up your nail, across the left, center, and right side of your nail.
- Then, apply a final coat of Step 3: Finishing Gel, covering the entire nail this time with slow and steady brush strokes. Ensure the entire nail is covered, including against the edges and up to the cuticles.
- Wait about 60 seconds for the final layer to dry, wiping away any excess liquid from hands and skin with a paper towel. Use caution to not touch the paper towel against the drying nails. Once dry, your manicure is complete!
Share this
Explore More


Questions? Comments?
Please be respectful, helpful, and engaging when sharing your thoughts. Your email will be kept private, only your name and comments will appear publicly.
This site is protected by reCAPTCHA and the Google Privacy Policy and Terms of Service apply.